
Use These Steps To
Packing A Backpack
For Backpacking Trips
By Diane Spicer

Packing a backpack seems like a no brainer.
Just dump your heavy hiking gear in the bottom of your pack, and light stuff on top, right?
Or maybe the least used gear on the bottom?
What about bulky but lightweight gear like a sleeping pad?
Hmm, the tent never changes size or weight, so where does it fit best?
And where should the food go?
Wow, perhaps there's a bit more to packing a hiking backpack than you'd first think.
But you're in the right place. These tips on packing a backpack will get you ready for the trail in no time flat.
Hold up a minute!
Don't have a backpack yet?
Kinda hard to pack when you don't have a pack, right?
If you need some tips on how to buy the best backpack for your hiking trip, read this.
Wondering if you've got everything you need?
Here's all of the best hiking gear.
- You do have a gear checklist, don't you?
If weight is a big concern for a lengthy hiking trip, read these pointers for lightweight backpacking gear.
Now that we've got that all squared away...
how to pack your backpack pointers, in three easy steps.
Step One in
packing a backpack:
reduce volume
The very first step in learning how to pack your backpack might be counter-intuitive:
- don't touch the backpack at all.
Instead, do this:
- lay out all of your backpacking gear in a circle around you.
Want to be really precise
about packing a backpack?
To make packing your backpack even more precise, a pre-step is to go over all of your gear, even the new stuff.
Look for rips, abrasions, frayed seams, poor stitching, non working zippers or fasteners, or anything else that would cause you trouble or discomfort on the trail.
Think beyond good weather scenarios. It's important to determine if your current gear would stand up to wind, rain, snow, extreme heat or other conditions.
Important considerations:
- Make the decision about water repellency -vs- water proof based on your hiking destination.
- Different levels of weather resistance along with different volumes will be needed as you develop your taste (craving?) for outdoor adventures.
Now circle back to that circle of gear
Stand up and take a long, hard look at your circle.
You'll notice that some of your hiking gear is bulky but compressible (jackets, sleeping bag).
Some of it has a fixed size (cook pots, stove, water bottles, tent).
And some of it is "stuffable" into the nooks and crannies of your pack (rain fly, clothing, food bags).
Go ahead and sort your gear into those 3 categories by making three big messy heaps.
You'll tidy up in the next step.
Pro tip
To reduce the volume of your bulky gear as much as possible as you're packing a backpack, use stuff sacks and compression sacks.
Already dialed in on what those are? Skip down to the next step.
Stuff, compression, dry bags -
what's the difference?
To give you a thorough answer to that question, let's look at some examples of each of these storage options before you begin packing a backpack.
Stuff sacks
Stuff gets stuffed into your stuff bags, you pull the draw string closed and lock it with a plastic cord lock, and voila! everything is in one neat, compact parcel.
Now you can stuff it into your pack wherever it will fit.
But there's more to it than that.
- The ability to shed water is essential for a stuff bag, but don't expect miracles in a downpour or if you leave it outside the tent overnight.
You can go two ways with purchasing a stuff sack:
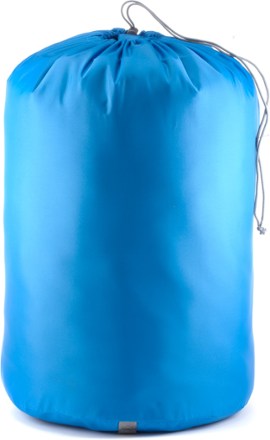
|
Inexpensive, relatively durable, reasonably water repellent and available in various colors and volumes like this REI Co-op Durable Stuff Sack. |
Both of these examples have something you really want:
- a pull handle on one end to help you pull out your gear.
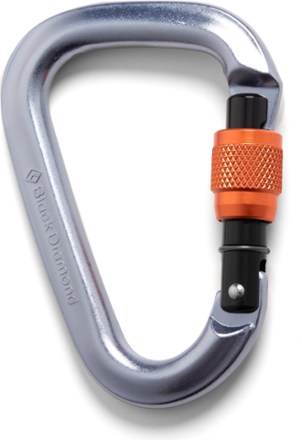
|
You can also attach a carabiner to the pull handle to hang it, like this Black Diamond Mini Pearabiner Screwgate Locking Carabiner from REI Co-op. |
Random tip:
Always have at least 2 carabiners clipped onto your pack. You never know when they'll come in handy, but they will, trust me!
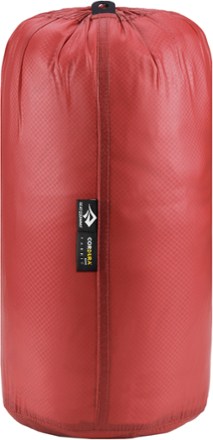
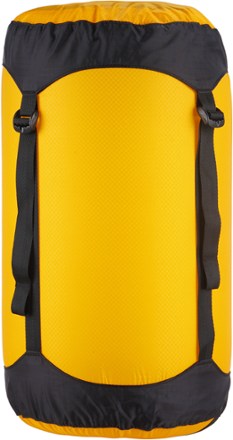
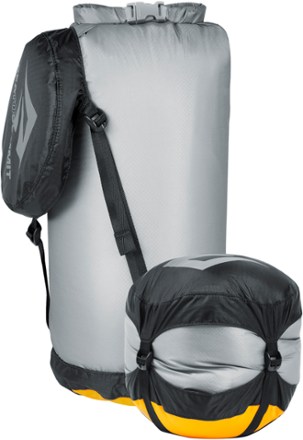
Compression sacks
To reduce the volume (i.e. squeeze all the air out) of your high volume hiking gear such as sleeping bags and hiking clothing, you will absolutely want to use compression sacks.
- Reduce the volume, and thus free up space in your pack!
Compression sacks are different from stuff sacks because they have at least 3 straps that run from one end to the other, with a handle on each that you pull as tightly as possible.
- This shrinks the volume of the bag by forcing out air.
- Cinching down the straps keeps the air out and reduces the volume by up to one third.
|
Water repellent compression sacks like this Sea to Summit Ultra Sil Compression Sack are good enough if you're going to keep the sack inside of your waterproof backpack or double walled tent at all times. |
Step up to water proof compression sacks like these if you absolutely want to remove the possibility of moisture.
Pro tip for compression sacks
I use three different volumes (color coded) of compression sacks on my trips to segregate my socks and underwear, bulkier clothing, and sleeping bag.
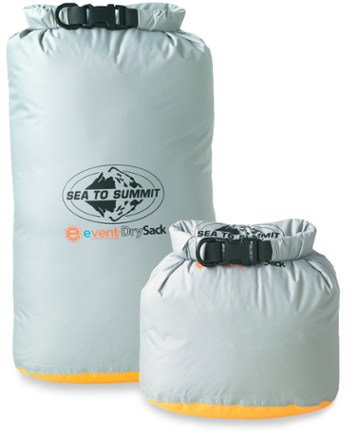
Dry bags
Let the name reassure you that whatever you put into it - food, socks, maps, electronics - will stay dry.
But expect to pay more for this reassurance, because the materials need to be durable and able to omit water under tough conditions.
In
my humble opinion, investing a few more dollars into a dry bag gives me
peace of mind as I'm packing a backpack to head off into wet or wintry wilds.
- I always double bag my camera or other electronics even in a dry bag, but that's just me. Trust only goes so far, right?
Dry
bags make great food storage containers that you can hang easily with a
D ring on one end, or a carabiner that you bring along (see above for a
good choice).
- The chance of odors escaping is minimal.
- If an overnight downpour occurs, your oatmeal is going to stay dry! You don't want to have to re-dehydrate oat flakes!
Not sure about food handling precautions at your campsite?
Here's good advice from REI.
Tip:
Be sure to turn down the top on a dry bag at least 3 times to ensure a watertight seal, and keep it away from sharp rocks.
Step Two:
what goes where?

Now that you've tamed your volume problem, turn your attention to putting your gear into your pack.
We'll assume that you have a top loading backpack, and that you're packing a backpack at home rather than at a campsite.
Important!!
Your spine is what's most important here.
Use it as a reference point to steer by as you are packing a backpack.
Now let's get to work.
- Drop your lightweight but bulky
sleeping bag (in its weather resistant compression sack, right?) into
the bottom of your pack, away from your spine.
- Pack
other light but not stuffable items around it on the bottom of the pack, things like titanium cook
pots, stove, fuel bottles.
Make use of every nook and cranny, especially in your cook pots, such as tucking in extra clothing or smaller stuff sacks wherever possible.
- I keep my "sleeping clothes" (clean long underwear top and bottom,
clean socks, wool or fleece hat) in a small stuff sack at the bottom, near my sleeping compression sack. You could also put them into your bag before compressing.
Center of gravity
Now shift your attention to your center of gravity - the area closest to your spine.
Heavy items like food and water (hydration reservoir) should be layered above that bottom layer near your back.
To keep these heavier items from shifting, stuff more clothing or your tent/rain fly/tarp around them.
- Decide if you prefer the convenience and organization of stuff sacks, or want to stuff "free form".
Pro tip
Always segregate your fuel bottle from your food:
- fuel at the bottom, wrapped in plastic, just in case of a leak.
External storage options
If you use an inexpensive roll up sleeping bag pad like this one, you will attach it to the outside of the pack with straps when you're all done packing a backpack.
If you use an inflatable sleeping bag pad, you can use one of the external pockets for storage, or stand it up lengthwise inside the pack if it fits.
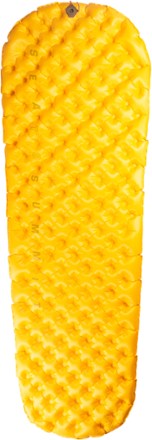
|
If it's really tiny, it rides along with your sleeping bag at the bottom. Here's a great tiny and lightweight choice: Sea to Summit UltraLight Sleeping Pad |
Use your pockets wisely!
The large top zippered pocket(s) will hold your frequently used gear:
- maps
- compass
- GPS
- trail snacks
- hat
- gloves
- bandanna
- lip balm
- sunglasses and sunscreen
Smaller pockets hold your first aid kit, bug repellent and head lamp - items you hope not to need but want to get to fast when you do.
Store your very small personal hygiene kit in a zippered pouch inside a zip locked plastic bag to minimize odors.
- Always stash it with your food in your home made "bear bag" or a bear canister outside of your tent.
- Note that toothpaste is really smelly and therefore enticing to bears, so consider using baking soda for cleansing your teeth and mouth during your trip.
Pro tip
Have your rain gear handy in an external pocket, especially if the weather is unpredictable.
Don't be the hiker digging through the backpack in a downpour, getting everything wet and risking hypothermia.
Personal decisions
when packing a backpack
Decide where tent poles will go: inside the pack, in an external pocket lashed down tightly, or under the top lid of the pack (not recommended, as their stuff sack is slippery).
Ditto for hiking poles, although it's easiest to put them, tips up, into an outside pocket so you can grab them fast.
- Your backpack may have handy loops designed for pole storage.
Avoid attachments
My personal preference:
Avoid having lots of things attached to the outside of your pack because they snag and catch on things along the trail, causing a loss of balance and/or reduced stride length.
Don't clip or hang cups or bottles or pots on the outside of the pack for the same reasons.
Plus it just looks
and sounds junky!
- You're a professional ;)
A few more
packing a backpack tips
Don't neglect to snug up the compression straps on the outside of your pack once you're finished loading up.
- This keeps everything in its place, reducing the possibility of a shifting load at an undesirable time.
Anything else sharp (crampons, microspikes, tools) needs to be wrapped in protective materials and stowed inside your pack, or on the outside of the pack with the tips covered.
Carry duct tape wrapped around a water bottle or hiking pole in an external pocket for field repairs.
- Also
carry a few safety pins, plastic zip tie downs & closures, needle,
thread and plastic bags for innovative patch & repair jobs, and as part of your survival kit.
Step Three:
stability and load shifting test
Once there are no items of hiking gear left around you in your circle of spilled gear, and you feel good about your packing job, put on your pack and take a walk.
- A long walk.
This is called a gear shake down hike, and that's exactly its purpose: to probe for where things seems a little shaky!
Imagine your load moving with you as you visualize yourself crossing a slippery log or clambering over rocks.
In the rain.
After dark.
What you're watching for
- If anything makes you feel tippy (top heavy) or dragged down (bottom heavy), go home and repack.
- If you're clanking and clunking and squeaking and can't hear yourself think, go home and repack.
- If things are shifting and you feel like you're a grumpy mule, guess what you need to do!
It's much better to figure out that your packing job is less than stellar on a shake down hike, than to set yourself up for a miserable first day on your backpacking trip, right?

Three packing steps:
there you have it!
Packing a backpack in three easy steps - can't get much easier than that.
You've invested time and effort, and that marks you as a smart hiker.
Now you've got a foolproof backpack packing system that will make you smile on the trail.
Need a review of the steps in packing a backpack?
One final tip
Memorize what goes where, make a sketch or take a photo, or write it down for future trips.
Why reinvent that particular wheel?
Then you can concentrate on more important things, like your delicious backpacking menu.
Home page > Best Hiking Tips >
Packing A Backpack In 3 Easy Steps
|
I get emails all the time about what I wear, eat, carry and love to use on the trail. That's
why I provide affiliate links to you: the best gear that I use myself and have seen used by other hikers is instantly
available for your consideration, and the gear company sends a few
pennies per dollar to this reader-supported hiking website. There is no added cost to you! Everyone ends up a winner: Great gear for you, strong gear companies, and more free hiking tips for everyone. Thanks very much for your support. It's warmly and sincerely appreciated. It also helps send these hiking tips to all your virtual trail buddies around the globe. |
 |
|
Diane Spicer was a beginner hiker in 1971, and never stopped hiking. She founded the Hiking For Her community in 2008 to encourage female hikers, those who wanted to begin hiking as well as those who were in love with this fantastic sport already. On this website she shares expert hiking tips and recommendations, gear reviews and photos from her outdoor adventures so you can learn the necessary skills for comfort confidence and safety on a hike. This reader supported website does not use sponsored or promoted content. There are no ads, no AI content or artificially generated or touched up photos, no paid link placements. Everything you read is based on decades of personal hiking experience in many different locations. Please enjoy these expert hiking tips as you explore what hiking offers in any weather, season or location. |
 |
Scraping the contents of the Hikingforher.com website for the purpose of AI (artificial intelligence) LLM (Large Language Model) training is strictly forbidden.
All rights reserved. No duplication of content without permission.
Photo credits: All photos on this website were taken by David Midkiff or Diane Spicer except where noted.
Disclosures
Privacy Policy
Copyright
Media
Hiking For Her is a participant in the Amazon Services LLC Associates Program, an affiliate advertising program designed to provide a means for us to earn fees by linking to Amazon.com and affiliated sites.